This post is shared from https://www.instructables.com/
If you’re going to build yourself a water-gun or a water pump in the coming hot summer, you’ll need some check valves. Buy one from the store? Or you can just make one by yourself.
The most expensive parts of a water pump are usually the check valves. In this project, we’re making some from scratch, for as little as you can imagine. Before we started, please watch the video first.
WARNING: The pressure tests and claims made on these check-valves is based solely on my personal experiences with the ones demonstrated in the video. Individual results may vary, and caution and care should be taken when loading the valves with high pressure. The risk of higher pressures is that the balls may be forced from the adaptor, shooting out like projectiles. High pressures may also cause the ball to lock up, preventing normal operation of the valve, or possibly even structural failure of the valve altogether. These valves are not made, or claimed, to be used in any heavy duty operations. Use of this content is at your own risk.
In this project, I’ll show 2 different ways to make a simple check valve. One is easy but only for low-pressure applications, and one a little more complex but worked well for applications up to around 50-60PSI.
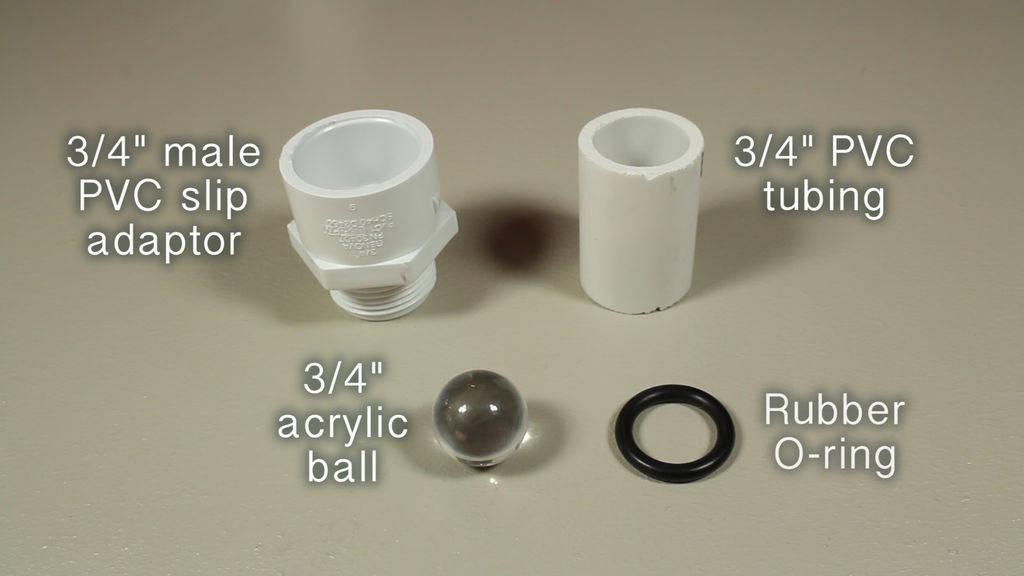
In either case, both valves will share 2 common parts.
1. One 3/4″ male PVC slip adaptor.
2. A length of 3/4″ PVC tubing (1-1/2″ or longer)
To make the quick and easy valve:
1. Find a 3/4″ rubber bouncy ball and slowly cut off the top 1/3rd.
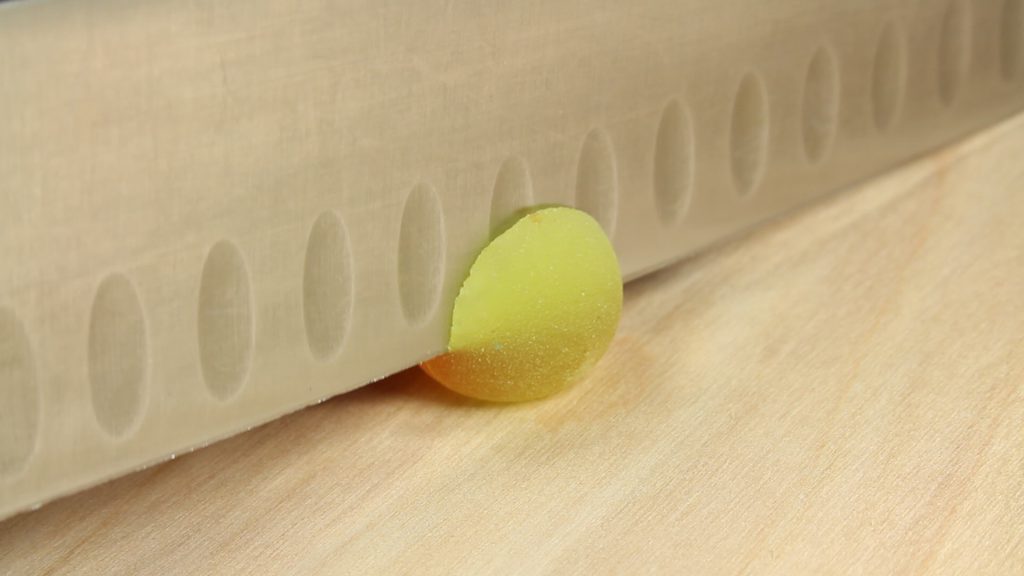
2. Place the ball inside the PVC slip adaptor with the round side facing down, and the flat side facing up.
3. Press the 3/4″ PVC tube into the slip adaptor down far enough that it is firm and tight, but leaving enough room for the ball to move around a bit inside.
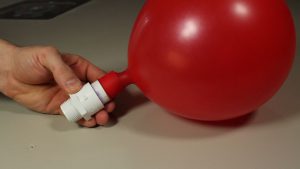
For low-pressure applications, like blowing up balloons, this little device will make your little kids feel like balloon blowing champions.cThe valve allows air into the balloon, and when you stop blowing, the valve closes and the air stays in the balloon indefinitely.
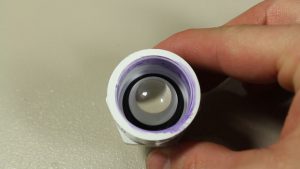
For this valve, we’ll use the harder plastic ball and an O-ring. These are made to be a little more durable.
To make a complex one:
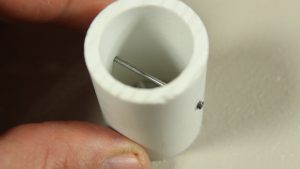
1. Start by taking a piece of 3/4″ PVC tubing (minimum 1-1/2″) and measure 5/8″ from the bottom.

2. Drill a hole at the mark that goes through both walls of the tubing.
3. Find a strong piece of metal, like a thick paperclip or a nail to insert into the holes.
4. Trim the head off the nail so that both ends of the nail or paperclip are flush with the outside walls of the tube.
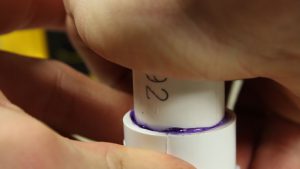
Prepare the slip adaptor for connecting;
1. Prime the inside walls of the adaptor, as well as the part of the tube that will slide into it.
2. Insert the O-ring and plastic ball into the adaptor, and check for a good fit and good seal.
3. Glue the parts that were primed, and slide the tube into the adaptor until the nail holes dip just below the surface.
4. Let the cement cure for about 2 hours before use.
After you finished the easy or/and the complex check valve, you should test it. To test your valve, use it to blow up a balloon.
The balloon should stay inflated even when you stop blowing. Place the valve into a bowl of water. If there is any air escaping at all, you will see little bubbles coming from the valve. If there are no air bubbles, that means your valve is air (and water) tight.
Homemade valves do save us a lot, but their scope of applications still has limitations. Perhaps it is suitable for home use, but it cannot be used on a large scale for industrial production. Therefore, sanitary stainless steel check valves are always recommended for industrial production, especially for food, drink and medical industries. Please visit http://www.adamantvalves.com/ for more information about sanitary valves.


One Comment
Tangwan joseph
Thanks for the article .the information in it will help me to construct a hydraulic ram pump. In case of any difficulty l hope to consult you.